As I mentioned in Week 1, this reno was going to rely on DIYs and thrifted furniture as the bones behind the design. In Week 2 I showed you a little behind the scenes into how I design a space and loved all of your questions about where I find my thrifted and vintage pieces.
What we accomplished this week:
- Faux board and batten finish on the walls
- DIY tassels and room decor plans
- Gave a fresh coat of paint to a coat rack James made with his dad when he was little
I also planed on showing you more of the pieces for the room, but with current shipping delays I hope to get that out to you in the next few weeks.
Here is the before and after from the first steps of adding the faux board and batten. The first images was after the majority of the wall prep was finished, and the after shows some of the boards up on the wall. They still need to be filled and smoothed, then painted.
Saving vs. Splurging
This is something I used to wrack my brain over. There are some things that are worth spending the extra bit of money on, and some that a cheaper version will be just as great.
For this this space we splurged on higher quality paint. We went with the top tier paint because of the unevenness of the walls. The paint has a self-leveler that helps give a smoother finish. With all the blood, sweat and tears that went into the wall prep, we wanted to maximize the fruits of our labor.
The items we are saving on are mainly the furniture and decor. Pretty much the whole space besides the rug and crib are going to be thrifted or re-used from around our home. Vintage furniture finds can really add a pop of character so I like to incorporate them whenever possible. You can find some of my tips for finding the best pieces here.
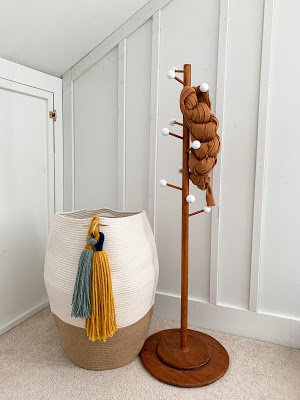
I added a few jumbo-sized tassels to this hamper from yarn that I already had, and am using this little kid-sized coat rack that James and his dad made when he was younger. You can see the before and after below.
A Special Note
Don’t forget to add a little note to the bottom of vintage finds. I always write about the prior history of the piece based on what I can find out and a little about the current home it’s in and the owners. That way if the item is passed on, the new owner can add in their little piece of history. It’s a special touch that I always treasure.
That’s wrap on Week 3 of the One Room Challenge! Thanks for checking out my update! You can find the rest of the participants of the One Room Challenge here.


Leave a Reply